Table of Contents
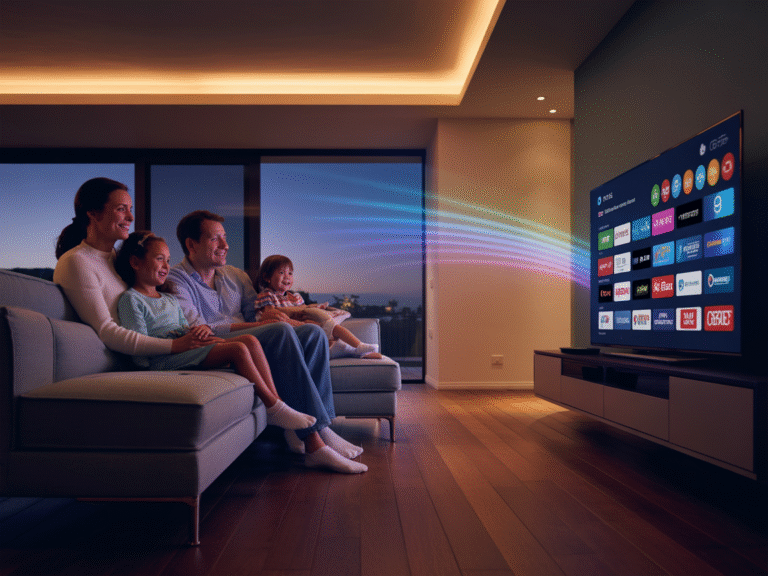
Have you ever settled down to watch your favorite show, only to realize you missed it? Or maybe you’ve scrolled endlessly through channels, not knowing what’s playing or when? If this sounds familiar, you’re not alone. Poor IPTV schedule management is one of the biggest frustrations for streamers today.
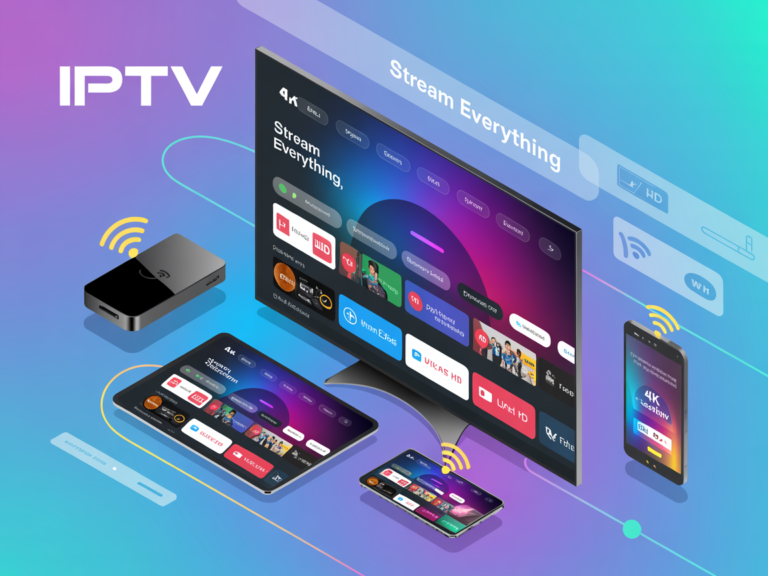
An IPTV schedule is your personal TV guide that shows what’s playing now and what’s coming up next on all your channels. Think of it as your roadmap to never missing another episode of your must-watch shows. When set up correctly, your IPTV schedule becomes your best friend for entertainment planning.
In this guide, we’ll walk you through 5 essential features that will transform your viewing experience. You’ll learn how to set up Electronic Program Guide integration, configure time zones, enable recording features, organize your favorite channels, and set up smart reminders. By the end of this article, you’ll have a fully optimized IPTV schedule that works perfectly for your needs.
What Is an IPTV Schedule and Why Do You Need One?

Let’s start with the basics. An IPTV schedule is a digital program guide that displays all available channels and their programming information in one easy-to-read format. It shows you what’s currently playing, what’s coming up next, and what aired earlier. You can browse through days or even weeks of programming, all from your screen.
Traditional TV guides were those printed booklets that came with your newspaper or cable bill. They quickly became outdated and were hard to search through. An IPTV schedule is different because it updates automatically in real-time. When a network changes its programming, your schedule updates instantly. You can search for specific shows, filter by genre, and even set reminders with just a few clicks.
The benefits of having a properly configured IPTV schedule are huge. First, you save time by seeing everything available at a glance instead of channel surfing. Second, you can plan your viewing in advance and never miss important shows. Third, you get detailed information about each program, including descriptions, cast lists, and episode numbers. Finally, you can record shows automatically based on your IPTV schedule settings.
Without proper setup, users face several common problems. Their program information might be hours off or show the wrong time zone. Channels could be missing from the guide entirely. Recording features might not work because the schedule data isn’t accurate. Some users see programs in languages they don’t understand or can’t find their favorite channels quickly. All these issues make the viewing experience frustrating instead of enjoyable.
Feature 1: Electronic Program Guide (EPG) Integration
Understanding EPG for Your IPTV Schedule
The Electronic Program Guide, or EPG, is the backbone of your IPTV schedule. It’s the system that provides all the program information you see on your screen. When you look at what’s playing on any channel, that data comes from the EPG. Without EPG integration, your IPTV schedule would be blank or show generic placeholder text.
EPG enhances your IPTV schedule by providing rich, detailed information about every program. You get show titles, episode numbers, air times, durations, descriptions, and even ratings. Some EPG systems include cast information, director names, and year of production. This wealth of information helps you decide what to watch and plan your viewing schedule effectively.
EPG is essential for navigation because it organizes thousands of hours of content into an easy-to-browse format. You can jump to specific times, search for shows by name, filter by category, or browse by channel. Without EPG, you’d have to watch each channel live to know what’s playing, which is incredibly inefficient.
How to Set Up EPG Integration
Setting up EPG integration for your IPTV schedule is easier than you might think. First, open your IPTV app or player and navigate to the settings menu. Look for options labeled EPG, Program Guide, or TV Guide. This is where you’ll configure your EPG source.
Next, you’ll need an EPG URL from your IPTV provider. This is a web address that contains all the program information. Your provider should give you this URL when you sign up. Copy this URL carefully, making sure to include every character. Then, paste it into the EPG URL field in your app settings.
After entering the URL, save your settings and trigger an EPG update. Most apps have a button that says Refresh EPG, Update Guide, or Download Program Data. Click this button and wait while your app downloads the schedule information. This process can take anywhere from a few seconds to several minutes, depending on how many channels you have.
The best EPG sources come directly from your IPTV provider, as they’re specifically matched to your channel lineup. However, if your provider doesn’t offer EPG data, third-party sources like XMLTV or EPG.best can work well. These services aggregate program information from multiple sources and format it for IPTV use.
If you’re experiencing EPG issues, start with these troubleshooting steps. First, verify your EPG URL is correct by testing it in a web browser. Second, check your internet connection, as EPG downloads require stable connectivity. Third, clear your app’s cache and try downloading the EPG data again. Fourth, make sure your app is updated to the latest version, as older versions might have EPG compatibility issues.
Benefits of EPG in Your IPTV Schedule
The benefits of proper EPG integration in your IPTV schedule are immediately noticeable. Real-time updates mean your program information is always current. When networks make last-minute schedule changes, your EPG reflects these updates automatically. You’ll never tune in for a show only to find something else playing.
Improved channel browsing transforms how you interact with your IPTV schedule. Instead of flipping through channels blindly, you can see what’s on every channel simultaneously. You can spot interesting programs you might have otherwise missed. The visual layout makes it easy to compare options and choose the best content for your mood.
The enhanced user experience extends beyond just seeing what’s on TV. EPG integration enables advanced features like searching for specific shows, setting up series recordings, and creating personalized watchlists. Your IPTV schedule becomes a powerful tool for entertainment management, not just a simple listing of programs.
Feature 2: Time Zone Configuration
Why Time Zone Settings Matter for IPTV Schedule
Time zone settings are crucial for your IPTV schedule accuracy. If your time zone is configured incorrectly, every program time will be wrong. You might think a show starts at 8 PM when it actually starts at 10 PM in your local time. This confusion leads to missed shows and frustration.
The impact of incorrect time zones on viewing extends beyond just the display times. When you set up recordings based on your IPTV schedule, they’ll record at the wrong time if your time zone is off. You might record two hours of the wrong program or miss your desired show entirely. This wastes storage space and defeats the purpose of scheduled recordings.
Time zones affect scheduled recordings in another important way. Many IPTV services broadcast from different countries or regions. If your IPTV schedule doesn’t properly convert these times to your local time zone, you’ll constantly need to do mental math to figure out when shows actually air. Proper time zone configuration handles all these conversions automatically.
How to Configure Time Zone Settings
Locating time zone settings in your IPTV app is usually straightforward. Open your app settings and look for sections labeled General Settings, System Settings, or Date and Time. Some apps place time zone options under the EPG or Schedule settings section. If you’re having trouble finding it, check your app’s help documentation or search for time zone in the settings search bar.
The step-by-step configuration process begins with identifying your correct time zone. Know your city or the nearest major city in your time zone. In your app settings, find the time zone dropdown menu or selection list. Scroll through the options until you find your location. Some apps list time zones by UTC offset, like UTC-5 or UTC+1, while others use city names like New York or London.
After selecting your time zone, save the settings and restart your app if required. Some changes take effect immediately, while others need an app restart to activate. Once restarted, check your IPTV schedule by looking at a few channels you know well. Verify that the program times match what you expect based on your local time.
Verifying correct time zone setup is essential before you rely on your IPTV schedule. Compare the times shown in your schedule with official network websites or other TV guide sources. Check multiple channels across different time zones if your service includes international channels. If everything matches your local time correctly, you’re all set. If not, double-check your time zone selection and adjust as needed.
Best Practices for Time Zone Management
For travelers using IPTV schedule features, time zone management requires extra attention. When you travel to a different time zone, update your app settings to reflect your new location. This ensures your schedule displays correct local times and recordings happen when you expect them. Some advanced apps offer automatic time zone detection using your device’s location services.
Handling daylight saving time changes is usually automatic in modern IPTV apps. Most applications detect when your region observes daylight saving time and adjust automatically. However, it’s smart to check your IPTV schedule on the day after time changes occur. Verify that program times have shifted correctly by one hour. If you notice any issues, manually refresh your EPG data to pull updated time information.
Feature 3: Recording and Catch-Up Functionality

The Importance of Recording in Your IPTV Schedule
Recording functionality integrated with your IPTV schedule means you’ll never miss a show again. Life gets busy, and you can’t always watch TV at specific times. With recording enabled, your system captures programs automatically based on your IPTV schedule, storing them for later viewing. You watch on your schedule, not the network’s schedule.
Building your personal content library becomes effortless with schedule-based recording. You can record entire series automatically, capture every episode of your favorite sports team, or save documentary marathons for weekend binge-watching. Over time, you create a customized collection of content that reflects your interests and preferences, all organized and ready to watch whenever you want.
Setting Up Recording Features
Enabling recording capabilities starts in your IPTV app settings. Navigate to the recording or DVR section of your settings menu. You’ll need to enable the recording feature if it’s not already active. Some services require a subscription upgrade for recording functionality, so verify your account includes this feature.
Configuring storage settings is your next critical step. Decide where recordings will be saved, either on your device’s internal storage, an external hard drive, or network storage. Consider how much space you’ll need based on your watching habits. HD programs use more space than SD programs. A good rule of thumb is to allocate at least 100 GB for casual recording or 500 GB or more if you plan to record extensively.
Setting up automatic recordings based on IPTV schedule data is where the magic happens. Browse your schedule and find a program you want to record. Select the show and choose your recording options. You can record a single episode, all episodes, or only new episodes. The system uses your IPTV schedule information to trigger recordings automatically at the correct times. You can set up multiple recordings for different shows, and they’ll all execute based on the schedule data.
Managing Catch-Up TV
Catch-up functionality works seamlessly with your IPTV schedule to give you access to recently aired programs. When you browse your schedule and see programs that already aired, catch-up lets you watch them on demand. This feature typically covers the past 7 to 30 days, depending on your service. Your IPTV schedule clearly indicates which programs are available for catch-up viewing, usually with special icons or markers.
Accessing previously aired content through your IPTV schedule is simple. Navigate to a past time slot in your schedule, find the program you missed, and select it. If catch-up is available, you’ll see a play or watch option instead of just program information. Click this option, and the program starts playing immediately. You can pause, rewind, and fast-forward just like a recording.
Storage and retention settings for catch-up differ from recordings because catch-up content is stored on your provider’s servers, not your device. You don’t need to worry about using your storage space. However, catch-up content expires after a certain period. Your IPTV schedule will show how long each program remains available. Some providers let you save catch-up programs as permanent recordings before they expire, giving you the best of both worlds.
Feature 4: Favorites and Channel Sorting
Organizing Your IPTV Schedule with Favorites
Channel organization matters tremendously when you have dozens or hundreds of channels in your IPTV schedule. Without organization, you’ll waste time scrolling through channels you never watch to find the ones you love. A well-organized schedule puts your preferred content front and center, making your viewing experience faster and more enjoyable.
Creating custom channel lists transforms your IPTV schedule from a generic guide into a personalized entertainment center. You can make a list of news channels, another for sports, one for movies, and another for kids’ programming. Each family member can have their own favorites list. When you open your schedule, you immediately see only the channels that matter to you at that moment.
How to Set Up Channel Favorites
Marking favorite channels in your IPTV schedule is usually a simple process. While browsing your channel list or schedule, find the channel you want to favorite. Most apps let you long-press on the channel name or click a star icon next to it. Some apps require you to open channel options and select Add to Favorites. Once marked, your favorite channels appear in a dedicated favorites list.
Creating multiple favorite lists gives you even more control over your IPTV schedule. Set up different lists for different moods or situations. Create a Morning News list, an Evening Entertainment list, a Sports Weekend list, or a Kids Safe list. Access the appropriate list based on what you’re doing, and your schedule instantly filters to show only those channels. This feature is especially useful in households with multiple users who have different viewing preferences.
Organizing by genre or preference makes your IPTV schedule incredibly efficient. Group all your comedy channels together, drama channels together, and documentary channels together. Some apps let you create folders or categories within your favorites. You might have a Premium Channels folder, a Free Channels folder, or an HD Only folder. The organizational possibilities are endless and should reflect how you actually watch TV.
Advanced Sorting Options
Alphabetical sorting is the simplest way to arrange your IPTV schedule when you have many channels. Instead of remembering channel numbers, you can quickly find channels by name. Most apps offer both A-Z and Z-A sorting. This method works well when you know the channel name but don’t watch it often enough to add to favorites.
Custom ordering based on viewing habits is a more sophisticated approach to organizing your IPTV schedule. Some smart apps track which channels you watch most frequently and automatically sort them to the top of your list. You can also manually drag and drop channels into your preferred order. Put your most-watched channel first, your second-most-watched channel second, and so on. This custom order stays consistent across all your devices if your app supports cloud syncing.
HomeHiding unwanted channels from your IPTV schedule declutters your guide significantly. Many services include channels in languages you don’t speak, categories you don’t watch, or duplicate channels. Instead of scrolling past these every time, hide them completely. Your schedule becomes cleaner and faster to navigate. You can always unhide channels later if your interests change. This feature is particularly useful for IPTV services that include hundreds of international channels.
Feature 5: Reminders and Notifications
Never Miss a Show with IPTV Schedule Alerts
The power of automated reminders integrated with your IPTV schedule cannot be overstated. You no longer need to remember when your shows air or set external alarms. Your IPTV system monitors the schedule for you and sends alerts before programs start. This automation ensures you never miss important episodes, live events, or special broadcasts.
Notifications improve your viewing experience by bridging the gap between planning and watching. You can browse your IPTV schedule in the morning, set reminders for evening programs, and then go about your day. When show time approaches, you receive an alert that brings you back to your TV. This seamless integration between schedule browsing and actual viewing makes your entertainment effortless.
Configuring Reminder Settings
Setting up show reminders through your IPTV schedule takes just seconds. Browse to the program you want to watch, select it, and look for a reminder or notification option. Tap or click this option, and you’re done. The system will alert you before the program starts. You can set reminders for individual episodes or entire series, depending on your needs.
Customizing notification preferences lets you control how and when you receive alerts. Access your app’s notification settings to choose between push notifications, on-screen alerts, email notifications, or sound alarms. You can also select the timing for your IPTV schedule reminders. Common options include 5 minutes before, 15 minutes before, 30 minutes before, or 1 hour before a program starts. Choose what works best for your routine.
Managing notification timing is crucial for avoiding alert fatigue. If you set reminders for too many shows or choose notifications too far in advance, you’ll become overwhelmed and start ignoring them. Be selective about which programs truly need reminders. Focus on live events, season premieres, or shows you consistently forget to watch. For regular series you never miss, reminders might be unnecessary.
Advanced Notification Features
Series reminders take your IPTV schedule alerts to the next level. Instead of setting a reminder for each episode individually, set one reminder for the entire series. Your system will alert you before every new episode airs, automatically consulting your schedule data. This feature is perfect for weekly shows, ensuring you stay current with every episode throughout the season.
New episode alerts solve the problem of not knowing when your favorite shows return from hiatus or when new seasons premiere. Your IPTV schedule tracks series information and identifies when a new episode appears that you haven’t seen before. You receive a notification letting you know fresh content is available. This feature works for both live broadcasts and catch-up content.
Push notifications versus email alerts offer different advantages for IPTV schedule reminders. Push notifications are instant and appear on your device screen immediately, perfect for time-sensitive alerts about programs starting soon. Email alerts are less intrusive and better suited for advance planning, like notifications about programs airing later in the week. Many users combine both methods, using push notifications for immediate reminders and email for weekly schedule summaries.
Tips for Maintaining Your IPTV Schedule
Regular updates and maintenance keep your IPTV schedule running smoothly. Make it a habit to check for app updates at least once a month. Developers regularly release improvements that enhance schedule accuracy, fix bugs, and add new features. Keeping your app current ensures the best possible experience with your schedule functionality.
Refreshing your EPG data should happen automatically, but sometimes manual refreshes are necessary. If you notice program information seems outdated or you’re seeing unexpected gaps in your IPTV schedule, trigger a manual EPG refresh. This downloads the latest schedule data from your provider and resolves most information display issues. Schedule a weekly refresh during off-peak hours to maintain optimal data quality.
Backing up your settings protects your carefully configured IPTV schedule preferences. Some apps offer built-in backup features that save your favorites, reminders, recording schedules, and custom settings. Export these backups to cloud storage or external media. If you need to reinstall your app, switch devices, or recover from a problem, you can restore your settings instantly instead of reconfiguring everything manually.
Optimizing performance ensures your IPTV schedule loads quickly and responds smoothly. Periodically clear your app’s cache to remove accumulated temporary files. Delete old recordings you’ve already watched to free up storage space. Close unnecessary background apps that might compete for system resources. These simple maintenance tasks keep your schedule functioning at peak efficiency.
Common IPTV Schedule Issues and Solutions
EPG Not Loading
When your EPG isn’t loading, your IPTV schedule appears blank or shows no program information. Possible causes include incorrect EPG URL settings, expired subscription data, network connectivity problems, or server issues on your provider’s end. Your app might also have corrupted cache files preventing proper EPG display.
Quick fixes start with verifying your internet connection is working properly. Next, check that your EPG URL is correct by comparing it with information from your provider. Force a manual EPG refresh through your app settings. If that doesn’t work, clear your app cache and data, then re-enter your EPG URL and download the schedule information fresh. Finally, restart both your app and your device to ensure all settings take effect.
Incorrect Time Display
Incorrect time display makes your IPTV schedule unreliable for planning and recording. This issue usually stems from wrong time zone configuration, outdated app versions, or EPG data that doesn’t properly account for daylight saving time.
Troubleshooting steps begin with verifying your time zone setting matches your actual location. Double-check that your device’s system time is correct, as some apps use device time as a reference. Update your app to the latest version, as developers often fix time display bugs in updates. Refresh your EPG data to pull new schedule information with corrected times.
Solutions include manually adjusting time zone offsets if your app allows it. Some apps offer a time correction feature where you can add or subtract hours from displayed times. Contact your IPTV provider if the problem persists across multiple devices, as the issue might be with their EPG data source rather than your configuration.
Missing Channels in Schedule
Missing channels in your IPTV schedule can happen when EPG data doesn’t cover all your available channels. Common reasons include using an EPG source that’s not fully compatible with your channel lineup, incomplete data from your provider, or channels being added to your service after your last EPG update.
To resolve this issue, first refresh your EPG data to ensure you have the latest information. Check if your IPTV provider offers an updated or alternative EPG source specifically for your channel package. Some users need to combine multiple EPG sources to achieve complete schedule coverage. Your app might support secondary or backup EPG URLs for this purpose.
If certain channels consistently lack schedule information, they might not be included in any available EPG feed. In this case, you can still watch these channels live, but you won’t have program guide information. Consider contacting your provider to request EPG coverage for these channels.
Recording Failures
Recording failures frustrate users who depend on their IPTV schedule for time-shifted viewing. Diagnosing the problem requires checking several potential causes. Insufficient storage space is the most common issue, recordings need free space to save content. Incorrect time zone settings can cause recordings to trigger at the wrong times, missing your desired programs. Network connectivity problems during scheduled recording times result in failed captures. Finally, conflicts occur when multiple recordings are scheduled simultaneously but your system can only handle one at a time.
Prevention tips include monitoring your available storage and deleting old recordings regularly. Always leave at least 20 percent of your storage free to accommodate new recordings. Verify your IPTV schedule times are correct before setting up recordings. Test your internet connection speed and stability during typical recording hours. Set up recording priorities in your app so important programs take precedence if conflicts occur. Consider upgrading to a service or app that supports multiple simultaneous recordings if you frequently schedule overlapping programs.
Best IPTV Schedule Apps and Tools
Top IPTV players with excellent schedule features include TiviMate, which offers a beautiful interface with robust EPG support, favorites management, and powerful recording capabilities. IPTV Smarters Pro provides comprehensive schedule features with catch-up integration and multi-screen support. Perfect Player combines simplicity with advanced EPG functionality and extensive customization options. Kodi with PVR add-ons offers incredible flexibility for users who want complete control over their IPTV schedule appearance and behavior.
Comparison of popular options helps you choose the right app for your needs. TiviMate excels at visual presentation and is perfect for users who value aesthetics alongside functionality. IPTV Smarters Pro works across more platforms and devices, making it ideal for users who watch on multiple screens. Perfect Player uses fewer system resources, making it the best choice for older devices or those with limited processing power. Kodi offers unmatched customization but requires more technical knowledge to configure properly.
Recommended apps for different devices vary based on platform capabilities. For Android devices, TiviMate and IPTV Smarters Pro both deliver excellent IPTV schedule experiences with smooth performance. iOS users should consider GSE Smart IPTV or iPlayTV, both offering solid schedule integration within Apple’s ecosystem. Amazon Fire Stick users get great results with IPTV Smarters Pro or Tivimate, as both apps are optimized for the Fire TV interface. Windows and Mac users can choose VLC with IPTV extensions, Perfect Player, or dedicated applications like MyIPTV Player. Smart TV users often get the best results with apps specifically designed for their TV’s operating system, such as Smart IPTV or IPTV Extreme.
Conclusion
We’ve covered the 5 essential features that transform your IPTV schedule from a basic guide into a powerful entertainment management system. EPG integration provides the foundation with detailed program information. Time zone configuration ensures accuracy for viewing and recording. Recording and catch-up functionality give you control over when you watch. Favorites and channel sorting personalize your experience. Reminders and notifications keep you informed about your must-watch programs.
Don’t wait to implement these features in your IPTV schedule setup. Each feature builds on the others to create a seamless viewing experience. Start with EPG integration to get your schedule populated with accurate data. Then configure your time zone to ensure correct timing. Next, set up favorites to organize your channels efficiently. Enable recording for shows you might miss, and finally, configure reminders for your most important programs.
Final tips for getting the most from your IPTV schedule include staying curious about your app’s features. Many apps include hidden or advanced options that can further improve your experience. Join online communities or forums dedicated to your IPTV service to learn tips from other users. Don’t be afraid to experiment with different settings until you find what works best for your viewing habits. Remember that the perfect IPTV schedule setup is personal and should reflect how you actually watch TV.
Start optimizing your setup today and experience the difference a properly configured IPTV schedule makes. You’ll spend less time searching and more time enjoying your favorite content. Take 15 minutes right now to implement at least one of these features. Your future self will thank you every time you sit down to watch TV and everything just works perfectly. Transform your viewing experience with these essential IPTV schedule features and never miss another moment of entertainment.